Guides · How To
How to Clean Your Coffee Grinder
Step-by-step burr grinder cleaning for better-tasting coffee, less static, and longer grinder life
Why Your Grinder Gets Dirty—and Why It Matters
Every time coffee beans pass through a burr grinder, two things happen that you can't see: microscopic coffee fines—particles far smaller than your target grind size—scatter and pack into every crevice, and the natural oils expressed from the beans begin to coat the burr surfaces, the chute, and the grounds bin. Left alone, those oils go rancid. That's not a hypothetical: rancid fat has a distinct sour, musty flavour that bleeds into otherwise excellent coffee.
A burr grinder works by pressing whole beans between two revolving abrasive surfaces set a precise distance apart, producing particles of a remarkably uniform size—a meaningful advantage over blade grinders, which chop beans unevenly and generate more friction heat. That uniformity is the whole point: as any serious look at grinding and particle size will confirm, the distribution of particle sizes produced by grinding is one of the key variables controlling extraction and flavour. A gunked-up burr set narrows that advantage fast. Packed fines change the effective gap between the burrs, forcing you to compensate with grind adjustments that shouldn't be necessary. Rancid-oil buildup makes every batch of fresh beans taste like last week's espresso.
The fix is straightforward, but it requires understanding which type of cleaning to do, and how often.
How Often Should You Clean a Burr Grinder?
Cleaning frequency depends on how much you grind, what roast level you're using, and whether you switch between beans regularly.
Quick-reference schedule:
- Weekly (light users, 1–2 coffees/day): Brush out the hopper and grounds path after emptying the hopper.
- Weekly (medium–high use, 3+ coffees/day): Run a grinding tablet cycle and brush the chute.
- Every 2–4 weeks (all users): Full brush-out of the burr chamber with the hopper removed.
- Every 3–6 months (moderate home use): Full disassembly and deep clean.
- After every bean change: At minimum, grind a small amount of the new beans through to purge residue from the previous batch. For a more thorough transition, use a tablet or brush cycle.
Darker roasts produce more surface oil than lighter ones, so if you regularly pull shots with a dark espresso roast, lean toward the more frequent end of those ranges. Oily beans can gum up burrs surprisingly quickly.
What You'll Need
Gather these before you start:
- A dedicated grinder brush (stiff-bristled, narrow enough to reach the burr chamber—most quality grinders ship with one, or you can buy a barista brush separately)
- Grinder cleaning tablets (such as Urnex Grindz or a comparable food-safe option)
- A soft toothbrush or cotton swabs for tight corners
- A dry microfibre cloth
- Mild dish soap and warm water (for hopper and grounds bin only—never the burrs or motor housing)
- A small bowl or container to catch debris
- Your grinder's manual (for disassembly specifics—every model differs)
Avoid compressed air cans inside the grinder unless the manufacturer explicitly approves it; they can drive fines deeper into the motor housing.
Method 1: The Daily and Weekly Brush-Out
This is your baseline maintenance—fast, tool-light, and enough to keep fines from compacting into the burr chamber between deeper cleans.
- Empty and remove the hopper. Never brush a grinder with beans still in the hopper; you'll just reintroduce debris. Empty the hopper completely, then unscrew or unclip it from the grinder body.
- Run the grinder briefly empty. A short two- or three-second burst (if your model supports running without beans) clears loose fines from the chute and throat. Check your manual—some grinders shouldn't run dry for more than a few seconds.
- Brush the top burr and the throat. With the hopper off, use your grinder brush to sweep the exposed upper burr and the area immediately around the burr throat. Work in short strokes, moving debris toward the chute exit rather than down into the motor.
- Clean the chute and grounds bin. Use the brush or a cotton swab to clear the exit chute. Wash the grounds bin with warm water and mild dish soap, rinse thoroughly, and leave it to air-dry completely before reassembling—moisture in a grounds bin can clump fines and encourage mould.
- Wipe the hopper. A dry microfibre cloth is usually enough. If the hopper is visibly oily, wash it with mild soap and warm water, rinse, and dry completely before reattaching.
- Reassemble and run a short purge. Grind a small amount of your current beans (roughly 5–10 g) and discard them. This re-seasons the burr surfaces and clears any brush fibres from the throat.
Time required: 3–5 minutes. Worth it every week.
Method 2: Grinder Cleaning Tablets
Grinding tablets—food-safe, compressed cleaning pellets—are the most effective way to dissolve rancid oils from burr surfaces without disassembly. They work by physically abrading and absorbing oil residue as they pass through the burrs.
- Empty the hopper completely. Do not mix tablets with coffee beans.
- Add the recommended quantity of tablets. Dosage varies by product and grinder size; follow the tablet manufacturer's instructions. Typically this is around 35–40 g for a home espresso grinder.
- Set your grinder to a medium-coarse setting. Running tablets through an ultra-fine espresso setting is harder on the burrs. Unless the tablet manufacturer specifies otherwise, open up the grind a few notches.
- Grind the tablets through. Allow them to clear the chute fully.
- Purge with coffee. Immediately after the tablets, grind a small amount of your regular beans (around 20 g) and discard. This clears tablet residue from the burr set and chute. Some users run two purge cycles for espresso grinders, where residue control is especially important.
- Return to your normal grind setting. Because tablets are slightly abrasive, your grind setting may shift marginally after a tablet cycle—re-dial your grinder as you normally would.
Tablets are particularly useful for high-retention grinders or those with complex grinding paths where a brush can't easily reach. For grinders like the Niche Zero, which is designed for very low retention, a tablet cycle every few weeks combined with regular brushing is often more than sufficient.
Method 3: Full Disassembly and Deep Clean
For a truly thorough clean—essential every few months, or when you notice flavour degradation that brushing hasn't fixed—you'll need to remove the burrs themselves.
Before you begin: Consult your specific grinder's manual. Burr removal varies significantly between models. The steps below describe a general process applicable to most flat or conical burr home grinders.
- Unplug the grinder. Non-negotiable. Never work inside a grinder that is plugged in.
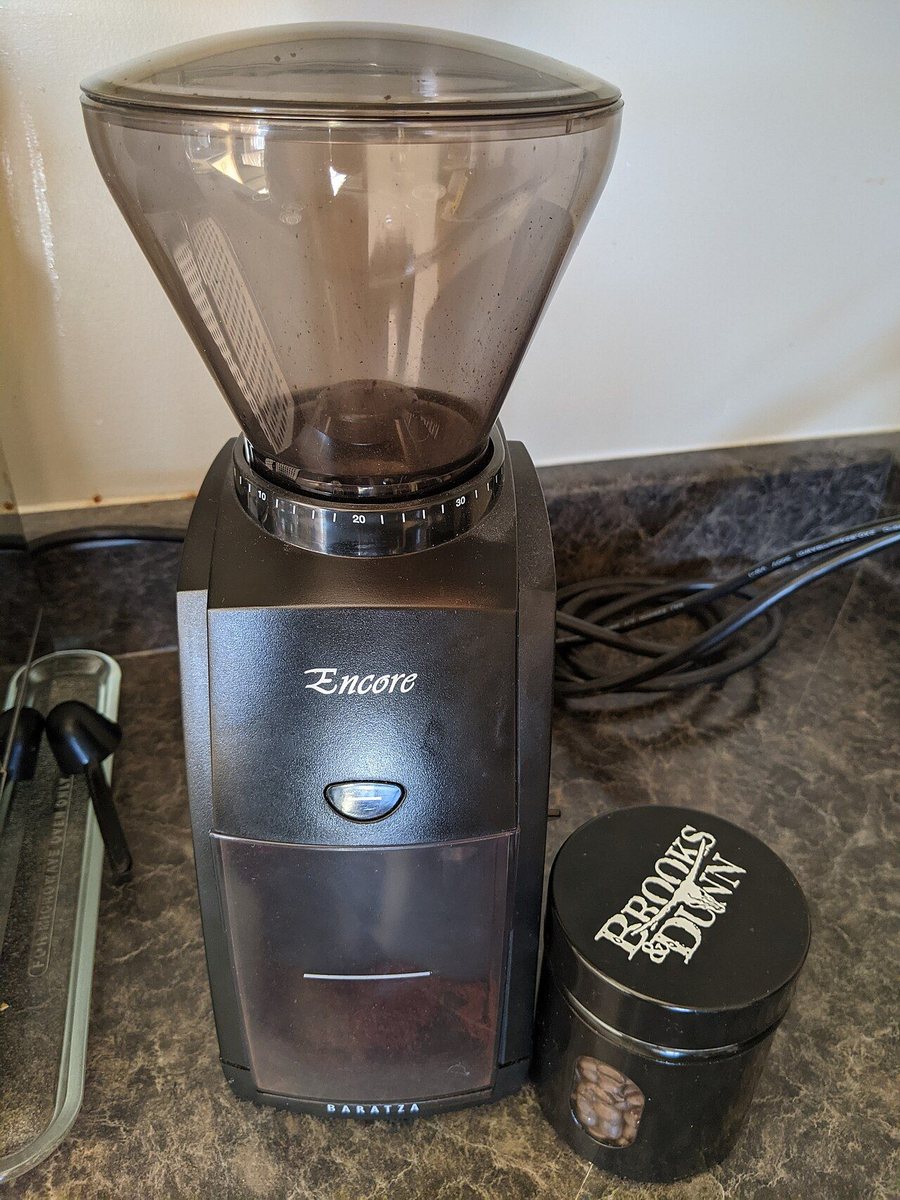
- Remove the hopper and top burr carrier. On most grinders, the upper burr carrier unscrews or unclips after the hopper is removed. Some models—such as the Baratza Encore ESP—use a simple twist-lock mechanism that makes this accessible for home users without special tools.
- Remove the upper burr. Burrs are often held by two or three screws. Keep screws in a small bowl so they don't vanish. Gently lift the burr free.
- Brush both burr surfaces. Use your stiff grinder brush to sweep the grinding faces of both the upper and lower burr. Work outward from the centre, following the spiral geometry of the burr teeth. Do not use water on burr surfaces—even stainless burrs can develop rust if moisture is trapped.
- Clean the burr chamber. With both burrs removed, use the brush and cotton swabs to clean the burr chamber walls, clearing compacted fines from every recess. A dry cloth can wipe larger debris.
- Clean the lower burr carrier. The lower burr is typically fixed to the motor spindle and may not be fully removable on home grinders. Brush around and beneath it as access allows.
- Inspect the burrs. While the burr is in your hand, look at the cutting teeth under good light. Significant chipping or rounding of the teeth indicates the burrs are approaching end-of-life. Most quality home burrs last several years of daily use, but worn burrs produce more fines and more bimodal particle distribution—both bad for flavour.
- Reassemble carefully. Replace the burr with the correct orientation (it usually only fits one way), tighten screws evenly without over-torquing, and reattach the upper burr carrier and hopper.
- Re-dial your grind. A deep clean almost always requires re-dialing. Run 20–30 g of your regular beans through and adjust as needed before brewing for consumption.
Time required: 20–45 minutes depending on your model. Worth doing every three to six months for regular home users.
Minimising Retention and Reducing Cleaning Frequency
The best cleaning is the kind you don't have to do as often. A few habits meaningfully reduce how much stale coffee accumulates inside your grinder:
- Buy freshly roasted beans in quantities you'll use within 2–4 weeks. Fresher beans express oils more cleanly and don't leave as much residue as aged coffee.
- Avoid very oily beans in grinders not designed for them. Certain blade-style espresso grinders—and even some flat burr designs—can gum up quickly with super-dark, oil-slicked beans. Light-to-medium roasts are generally easier on equipment.
- Single-dose if possible. Loading only the beans you need per session, rather than keeping a full hopper, limits how long oils sit against the hopper walls and the upper burr.
- Use the purge method when changing beans. Grind 5–10 g of the new beans and discard before pulling your actual dose. This flushes the grinding path of the previous bean's residue.
- Low-retention grinder design helps. Grinders engineered for minimal retention—like the Niche Zero with its single-dose, low-retention conical burr design—leave less stale coffee in the grinding path between sessions, reducing the rate of oil accumulation.
The relationship between grind consistency and brew quality is direct. Keeping the grinding path clean is simply the mechanical prerequisite for that consistency to hold.
A Note on Static and Fines
Fines and static often go together. After cleaning, you may notice that static actually increases temporarily, especially in dry environments—this is normal, and will settle as the burr surfaces re-season with a small amount of coffee oil. If static is a persistent problem:
- The Ross Droplet Technique (RDT): Add a single drop of water to whole beans before grinding. The moisture dramatically reduces static without affecting flavour at this quantity.
- Run the grinder a few seconds longer after the beans are finished to clear fines from the chute before they can scatter.
- Ground bins with anti-static coatings (offered by some accessory manufacturers) can help collect grounds without them clinging to the walls.
Grinder-Specific Considerations
Flat burr grinders tend to accumulate more fines in the space between the burrs and the grinding chamber walls. They often benefit more from tablet cleaning cycles than conical burr designs.
Conical burr grinders typically move coffee more directly from burr to chute and often have lower retention. Cleaning intervals can usually be slightly longer, though they still need regular attention.
Manual grinders are almost always disassembly-friendly by design—a brush-out and rinse of the burr carrier (dried thoroughly before reassembly) is a practical option that electric grinders can't take advantage of.
The Baratza Encore ESP, one of the most popular entry-level electric flat burr grinders, has a well-documented cleaning process in its manual and Baratza publishes step-by-step video guides on their site—a useful resource if you're new to disassembly.
Summary Checklist
| Frequency | Task |
|---|---|
| After each bean change | Purge 5–10 g of new beans, discard |
| Weekly | Brush hopper, throat, and grounds bin; wash bin |
| Every 2–4 weeks | Grinder tablet cycle + purge |
| Every 3–6 months | Full disassembly, burr clean, reassemble and re-dial |
| Annually or as needed | Inspect burrs for wear; replace if chipped or rounded |
A clean grinder is a calibrated grinder. The time invested—mostly minutes per week—is returned directly in every cup.
Gear for this
Frequently asked questions
- How often should I clean my burr grinder?
- For light home use (one or two coffees a day), a weekly brush-out and a tablet cycle every two to four weeks is a solid baseline. Full disassembly is worth doing every three to six months. If you use very dark, oily beans or switch beans frequently, clean more often.
- Can I wash my burrs with water?
- As a general rule, no. Even stainless steel burrs can trap moisture and develop rust or, at minimum, produce clumping fines. Stick to dry brushing for the burr surfaces themselves. The hopper and grounds bin are the parts safe to wash with mild soap and water—just make sure they're completely dry before reassembly.
- Do grinder cleaning tablets damage the burrs?
- Food-safe grinding tablets are formulated to be safe for burr surfaces when used at the recommended frequency (typically every two to four weeks for home use). They are mildly abrasive by design, so after a tablet cycle your grind setting may shift slightly—re-dial as normal. Avoid running tablets through an extremely fine espresso setting unless the tablet manufacturer specifies it's safe.
- Why does my coffee taste sour or stale after I've bought fresh beans?
- If fresh beans still produce stale-tasting coffee, rancid oil buildup in the grinder is a likely culprit. Even a small amount of old oil residue on the burr surfaces will coat and contaminate each new batch. A tablet cleaning cycle followed by a purge grind is usually the fastest fix.
- How do I know when my burrs need replacing rather than cleaning?
- During a deep clean, inspect the burr teeth under good light. Visible chipping, significant rounding of the cutting edges, or a noticeable increase in fines and inconsistent extraction even after thorough cleaning are signs the burrs are worn. Most home burrs last several years of daily use before needing replacement.
- What is the Ross Droplet Technique and does it work?
- The Ross Droplet Technique (RDT) involves adding a single drop of water to your whole beans immediately before grinding. The small amount of moisture neutralises static charge, which dramatically reduces fines clinging to the chute, grounds bin, and portafilter. At such a small quantity, it has no measurable effect on flavour. It's a widely used and low-cost trick, particularly useful in dry climates or after a fresh grinder cleaning.
See also